Wednesday, June 5, 2013

FIVE GENERATIONS! Life is busy around here!

FIVE GENERATIONS AND GROWING STRONG!  Mother's Day 2013
Obviously I come from a very busy and prolific, longevity family!  Yes I know, we are also very goofy.  In the above picture is just part of my Paternal side of the family.  My family is a very mixed-variety type and it is really a little complicated to explain but the five generations in the above picture are (in order) Great Great Grandma Hazel, Great Grandma Deanna, Grandma Chandy (me), my son Nick, and his princess daughter Addison.  Of course the family could not have grown without our significant others to supply the other half of the DNA possible to create each generation.  Listed from left to right starting with the back row and relationship to the little princess (5th generation maker) is Aunt Rachael, Great Grandma (ShaNaNa)Deanna, cousin Abbie, Great PaPa making a peace sign, cousin James, Uncle Mike (with an "M"), Great Uncle Jim, cousin Joe, cousin Jake.  Next row kneeling behind the sofa: cousin Jess (James wife soon), Aunt Becky, Great Great Aunt Diane.  On the couch:  mommy Michelle, Princess Addison, daddy Nick, Great Great Great Grandma Hazel, Great Aunt Dandy, Front row and looking like dorks:  Grandma Chandy "ME" and Grandpa Brian!  Missing are my brothers and Great Uncles Mike and Joe (and Joe's wife Great Aunt K.D. and their twin boys and cousins George and Clark) and cousin Gaby (she had to work).
First rising
Final rising


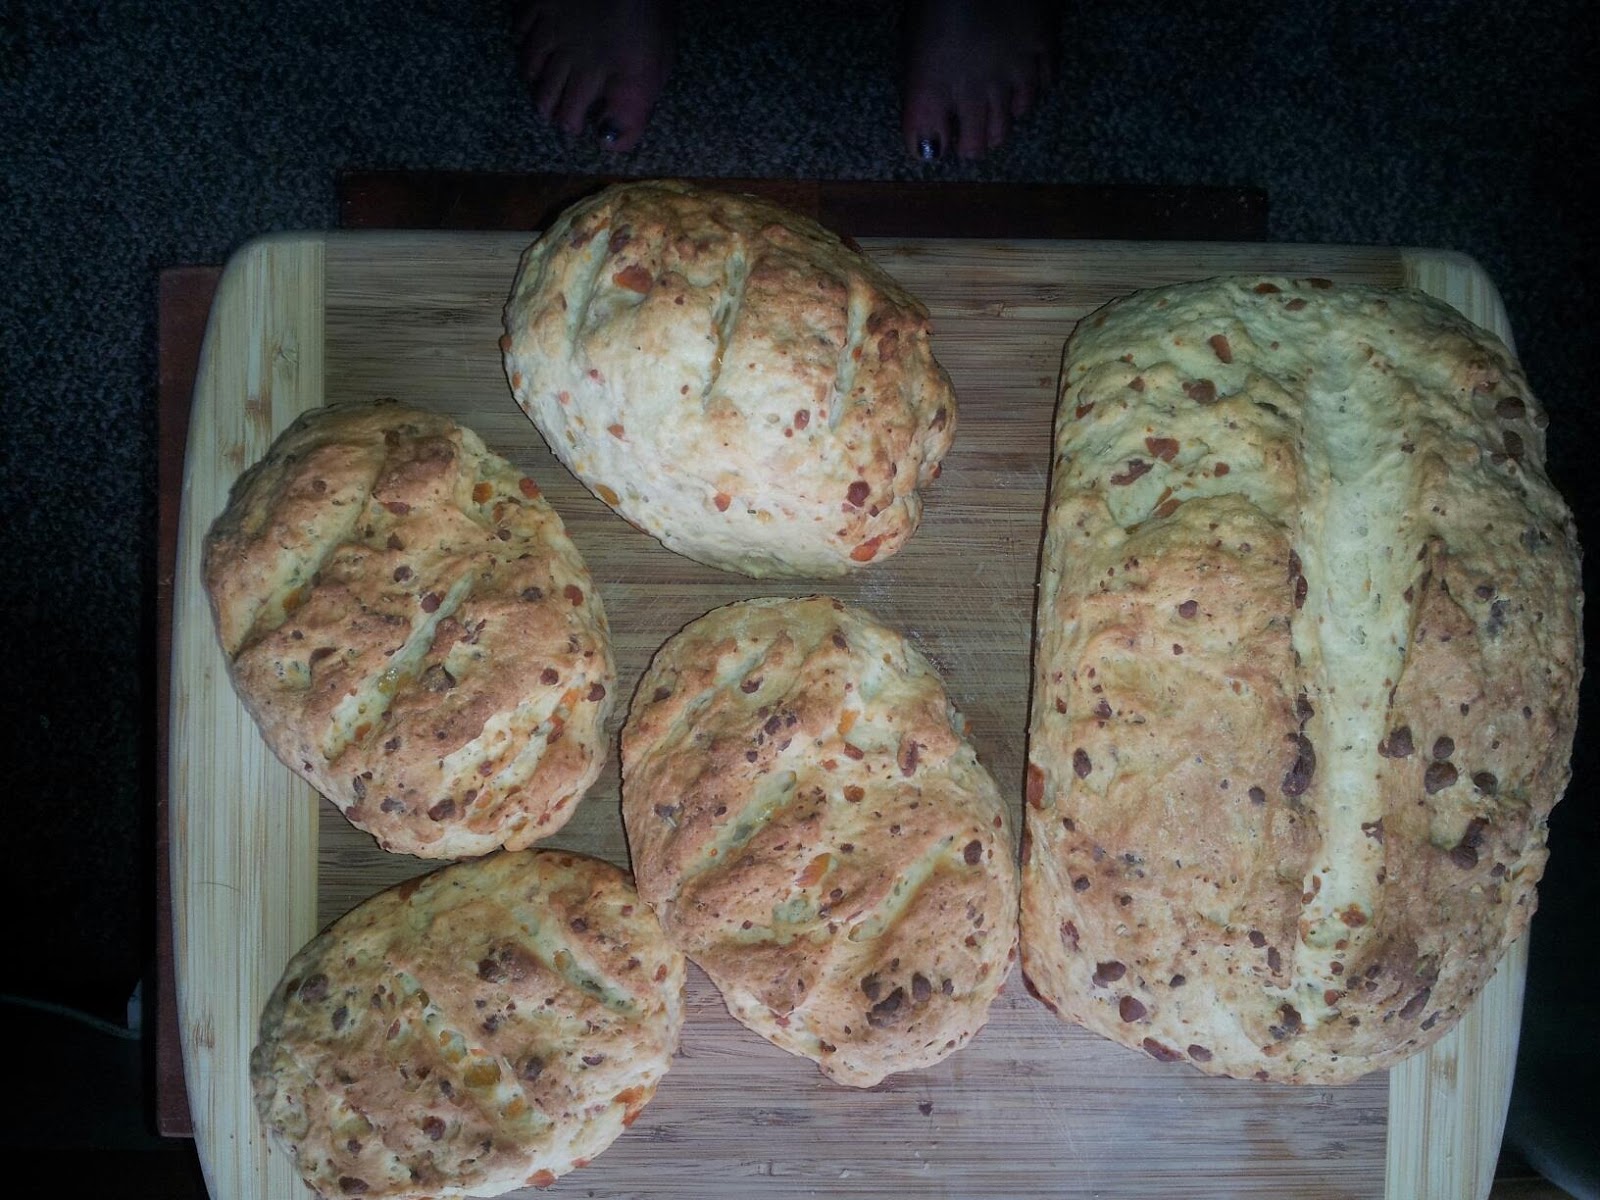
So, I woke-up today with the headache I went to bed with.  Bummer!!!  I decided that it would be a good day to make bread since I am down to only two slices left of my last loaf of two days ago.  Today it is a sour dough (my own homemade starter) enriched with ground flax seed, oats and hemp seeds. I am thinking that this will be very tasty.  Problem is I love bread loaded with all it's carbs and I am diabetic!  Another Bummer!!!

We have been busy around the house the past week or two.  I saw a really cool "vertical" veggie growing idea that frees up twenty spots in my garden for other plants.  I emailed Brian pictures and asked him if he would help me make one.  He is my McGiever (sp?).  Together we make a great team.  On his way home from work that day he stopped and bought the materials I needed ($20) and we set to work.  It is an 8' long 6" diameter PVC tube.  It was cut down to 7'.  On two opposite sides starting at one foot and 2" from the bottom of the tube we cut 2" diameter holes 16" distance from the next up to the top of the tube.  Then on the other two opposite sides starting at one foot 34" we did the same. This gave us 20 holes in the tubing.  The tube was then buried one foot into the ground and filled on the inside of the tube with soil up to ground level.  That put our first two holes 2" above ground level.  We filled the tube with a water retention enriched soil to the bottom of each hole planting a seedling as we planted up the tube.  When we got to the top I planted a basil plant in the top opening.  21 plants planted in the space we would usually use for one plant.  It has been almost three weeks since we planted and my seedlings have been growing into healthy plants.  I planted acorn squash in the bottom two holes and then various hot peppers and three cherry tomatoes in the other holes.  I may need to add some support such as ties to the tube to support the growing plants at some point.  I will watch this.  Here are some pictures:
The black spots on the tube are from where I first marked the tubes to be cut and then decided that I wanted them spaced differently.

 I am also trying my hand at growing red potatoes in 5 gallon buckets.  I do not have enough garden space to grow everything I would like.  I would like to be as self sufficient as possible but Brian does not want to dig up the whole yard and make it into a food producing yard.  Therefore, I must be innovative.  I have two potato buckets started and plan on doing another red potato bucket and one or two sweet potato buckets.  I am in the process of making my sweet potato slips.  Since the weather has been chilly up here in the upper Midwest they can not be planted yet.
We have drilled holes in the bottoms of the buckets and around the sides of the bottom of the buckets for drainage.  You then put a couple inches of soil in the buckets, plant your slips and cover them with just enough soil to cover.  Water.  When they have grown sprouts several inches above the soil, you then add more soil to almost cover the new growth.  You keep repeating this process until you get up to an inch or so from the top of the bucket and water until the plant has bloomed and the blooms die off.  Then, theoretically, I should have a buck full of potatoes.  Just tip the buckets over and harvest the spuds!  

So, I come up with all of my ADHD ideas and want to do all this stuff and propose them to Brian.  He is a Saint to go along with me or at least allow me to try some or most of them.  Sometimes, I think that my headaches are caused by all of the ideas that are running through my brain and I know that I can not act on all of them.  As I have mentioned earlier, I do not have enough garden space.  I had sent Brian some other ideas but he said "NO" to the pallet vertical wall gardens.  But when he made a trip to California a couple of weeks ago guess what he saw????  He saw many pallet vertical gardens all planted up at a Farmer's Market.   He thought that was pretty cool but still did not want to help me make any this year.  Perhaps next.  What he did agree to after he saw several was building me a small raised bed sweetcorn bed.  So, I now have a 4'x6' raised corn bed.  I had started about a 1/3 of my corn plants inside and then transplanted them.  Then I planted the rest of the seeds right in the bed.  I have read that if you stagger your plantings a little you will get corn to eat at a staggered rate.  I believe that I have 21 seedlings planted and then about 30 more seeds sown in this small space.  Brian said that the ones he saw had the plants closer but I would rather allow my plants to have a little more space.  In the picture below, you will see some foot prints in my raised bed from the ferrell cats that we caught last year, had fixed and released.  They are living under our shed and Aunt Diane keeps feeding them.  She even made them an insulated home to sleep in over the cold winter months.


My mixed variety Mint garden is going crazy.
If anyone wants to come over and pick mint,please be my guest.  If you look closely, on the very left side of the picture below is a patch of Horehound and on the very right of the bed is my (not yet in bloom) lavender.

Here is a picture of my general garden.  Lots of Tomatoes, cucumbers, peas and beans planted around the edge that will be trained to grown up the fencing (works like a charm every year).  This year I decided to plant some melons between my tomato plants so that they can grown low to the ground under the tomato plants. However, I am still toying with the idea to train them up on a trellis.  I have been doing research and heard that they do well that way.  The tomato plants can be trained to do that as well.  My jury is still out and I have time to change my mind.  


In the time that it has taken me to write this blog, my bread has risen to the point of being ready to bake.  So, off to the kitchen to put on my bakers cap.  While it is baking, I think that I will work on my FB Farm and take time to breath in the wonderful aroma of homemade baking bread.  


What can you find to inspire you to sit back, relax, enjoy, think about and find the Wisdom to Breath in today?

Have to share the finished product.....and how I had to have some!  Yumm, did not stop at one piece, glad I made two loaves...  ;)


Thursday, March 28, 2013

Say "Cheese" this whey! (more pic's to come)


I am not sure why I pick the new things I choose to try.  I was laying in bed this morning and decided that I was going to make cheese today.  So, I got up and did some research on quick home cheese making.  I found some good tutorials on YouTube and of course decided to make some of my own modifications so that I could call it my own.  Off to the store I went to pick up a fresh cheese cloth and two gallons of whole milk (I thought I was going to be ambitious and do two batches but I only did one and therefore only used one gallon of milk).

Here is what you need for ingredients:
1 gallon of whole milk
1/4 cup distilled white vinegar
1/4 cup lemon juice
to flavor you may want a little salt, garlic powder, fresh herbs, etc.

Here is what you need for equipment:
1 large pot to hold slightly more then a gallon of liquid
1 large strainer
1 large mixing bowl
1 smaller mixing bowl
wooden or metal mixing spoon
1 cheese cloth (or clean muslin dish towel)
measuring cup
liquid cooking thermometer

Directions:
Pour your milk into the pot and heat at a medium high heat stirring constantly all the way to the bottom making sure the milk is not sticking to the bottom of the pot.  Heat until the milk starts to steam and measures 120 degrees.


Add the vinegar and lemon juice while stirring. Continue to stir for about 15 seconds and then remove from heat.  The mixture will start to separate into curds and whey.  Cover and set timer for 15 minutes.


Put your strainer into a large bowl and line the strainer with your cheese cloth.  After 15 minutes, pour your curds and whey into the lined strainer.  Using your mixing spoon, gently press the mixture to remove as much of the whey from the curds.

Pick up the cheese cloth at the edges and lift from bowl gently squeezing out as much of the whey as possible.

Empty the curds into the smaller bowl and continue to remove as much of the whey as possible.

Kneed your preferred seasoning into the very soft cheese (I used about 1 teaspoon of sea salt and 1/2 teaspoon of garlic powder).  At this point you will have a cream cheese.  If you want to have a firmer cheese, you can put it into another clean cloth and continue to let it strain out more whey.

So what to do with all that whey??????  Well, from what I have read, it is full of protein.  So, I decided to use as liquid in my homemade bread.  I substituted it for the one cup of hot water I usually use in my bread.  Got it rising now.

I am thankful for that despite all the adversity in my life right now I still had the wisdom to drag myself from bed, try my hand at cheese making and breath!

Enjoy!
   

Friday, February 1, 2013


I had found a picture of a similar scarf (neck bow) but the directions were a little difficult to follow.  So, I just made my own pattern up.  I will share it.  This is a crochet pattern using a #5 hook.  It took me about 4 hours to compete.

supplies:
one ball of your favorite color basic yarn (you will not use the whole ball)  Call it color A
one ball of another color for the trim.  You do not need much but I would make sure that you have at least a quarter of a ball to be on the safe side.  Call it color B
size 5 crochet hook....call it what it is, a size 5 crochet hook or the first step towards carpal tunnel!
yarn needle

SC = single crochet
DC= double crochet

With color A:
Row One:  Chain two
Row Two:  Two SC in first chain, chain one, turn (2 stitches created)
Row Three:  Two SC in each SC, chain one, turn (4 stitches created)
Row Four:  Two SC in each SC, chain one, turn (6 stitches created)
continue as above in rows 3-4 until you have a row with 18 stitches

Now you will decrease back to a row with 6 stitches by doing the following:
Once you turn after having a row of 18 stitches you will decrease one stitch at the start of the row and again in the last two stitches of the row.  This will leave you with a row of 16 stitches,  chain one, turn.
Repeat this process until you have a row of 6 stitches, chain one, turn

SC in each of the 6 stitches across, chain one, turn repeating this row until this length of six stitches measures about 2.5 inches long.k (write down or remember how many rows you needed to make of the six stitches to make this section 2.5 inches, you will need to do this again later).

Increase again with SC's in each row as follows until you again have 18 stitches in each row Two SC in first chain, chain one, turn (2 stitches created)

Two SC in each SC, chain one, turn (4 stitches created)
Two SC in each SC, chain one, turn (6 stitches created)
continue as above in rows 3-4 until you have a row with 18 stitches


Now you will do a double chain in each SC until you have a length to wrap around your neck and then a little more.  Each row should still be only 18 stitches with a chain one, turn at the end of each row.

Once you have your desired length you will start decreasing again.

Now you will decrease back to a row with 6 stitches by doing the following:
Once you turn after having a row of 18 stitches you will switch back to SC and decrease one stitch at the start of the row and again in the last two stitches of the row.  This will leave you with a row of 16 stitches,  chain one, turn.
Repeat this process until you have a row of 6 stitches, chain one, turn.


SC in each of the 6 stitches across, chain one, turn repeating this row until this length of six stitches measures about 2.5 inches long. (refer back to the number of rows you wrote down or remembered earlier to create this length).

You will now start to increase again to back the second bow.  We will start by referring to these rows again with row one.


Row one:  Two SC's in first stitch, one SC in each stitch until end of row, chain one, turn (8 stitches).
Row two:  Two SC's in first stitch, one SC in each stitch until end of row, chain one, turn (10 stitches).
continue this until you have 18 stitches.

Now you will decrease back to a row with 1 stitches by doing the following:
Once you turn after having a row of 18 stitches you will decrease one stitch at the start of the row and again in the last two stitches of the row.  This will leave you with a row of 16 stitches,  chain one, turn.
Repeat this process until you have a row of 1 stitch.  Slip stitch and tie off.

With color B:
Pick any stitch around the back of the scarf and slip stitch into it.  Do a single stitch in each stitch that you see  all around the entire scarf.  It does not need to be perfect.  when you get to the point (bow tip) on each end SC three times in that stitch to make the curve.  When you get back to your starting point, slip stitch and tie off.

To make the strip to tuck your one bow end into and hold the bow in place you will start a new small piece.
With color A
Row one:  Chain 6, turn.
Row two:  SC in second chain from hook, chain one, turn. (5 stitches)
Row three:  SC in first chain from hook, chain one, turn (5 stitches)
Repeat Row three until length is about 2.5 inches.  Slip stitch and tie-Off.

With color A sew the strip to one side of the scarf on the section of scarf where the stitches are only 6 stitches in length.  Sew on each end of the strip you created so that you can tuck the bow through as in my picture.  Weave all your loose yarn ends into the piece.  Enjoy!


So, while I made my scarf I sat and though about how wonderful my family is.  My son and his wife has blessed us with a beautiful and healthy granddaughter.  Her name is Addison and she was born January 17th, 2013.  Thank you Nick and Michelle!

My pain in my body has been terrible lately but I continue to push on.  I have been notified that my hours at my primary source of income are being cut to perhaps only 10 hours/month.  I am not sure what I will do to make ends meet but, I have faith in our God that we will be provided for.

Until all of this is sorted out......I will find the Wisdom to breath!


Sunday, January 13, 2013

Super easy adaptable bread recipe!


Okay, so here is my very own recipe which I have developed and tweaked.  You can do all sorts of add-ins.  I will give instructions for the basic white bread and then explain how to make the variations to the recipe including the yummy Rosemary, Garlic & Cheddar bread in my picture.  This will make two loaves or how every many little loaves you care to shape up.  Bread has to be one of the easiest and most rewarding kitchen projects to create!

Do not fear the yeasties!!!!!!!!

Chandy's basic bread recipe:

1 egg
3/4 cups milk
1 cup hot tap water
1/4 cup olive oil (plus extra to coat your dough while rising and to oil your baking dishes)
2 tsp. salt
1 tbsp. sugar (or honey) do not use sugar substitute
5 cups flour
4 1/2 tsps of bread yeast (or two packets if you do not buy in bulk)

Extra add-ins listed after the recipe

In a large 2+ glass measuring cup break the egg and beat it with a fork.  Add the milk and then add the hot tap water to make the total in the cup equal 2 cups.  Put your yeast on top of the mixture and give it a gentle little mix to just moisten the little buggers.  Add the 1/4 cup olive oil into the measuring cup and set this aside.

In a very large (and I mean very large) mixing bowl put all the flour, salt, sugar and any of your mix-in's into the bowl.  Take off any rings you are wearing, roll up your sleeves and head to the sink to give your hands and under your fingernails a good washing.  I use a brush to get under my nails because from here on in you will use your hands.

In the bowl, toss the dry ingredients and mix-ins with your hands mixing it up well.  Push the dry ingredients to the edge of the bowl and add in your measuring cup wet mix of stuff to the center of the big bowl.  Start to cover your liquids with the flour mixture and then dig in.  I do all of my kneading in the bowl.  You want to kneed the stuff into a very nice elastic, slightly sticky ball of dough right in your bowl.  I promise that if you keep it up long enough (somewhere between 5-10 minutes) you will get a perfect ball of dough.  You want all ingredients well incorporated and then knead another couple of minutes.  I use my ball of dough to clean the inside of my bowl as I am kneading.  Think of this as burning off calories so that you can eat more of your bread when it is done!  :)

When you have accomplished the above, lift the ball of dough with one hand and pour about 3 tbls. of olive oil into the bottom of your bowl.  Put your nice ball of dough back into the bowl and turn it in the oil until your dough is covered with oil.  Put a piece of plastic wrap over the bowl to keep your dough moist and to keep the heat in the bowl that the chemical reactions will create while the yeast start to do their work.  You will want to set the bowl in a nice draft free location until the dough has doubled in size (about an hour but faster if it is a warm season).

Punch down the dough and divide the dough into two pieces.  Slightly rub olive oil onto the bottom and sides of the baking dishes you choose to bake your bread in.  Cover the dishes with plastic wrap and set aside until the dough doubles again in size (about an hour).  I find that if I put them into my cold oven on a the upper rack and put a bowl of hot water on a rack below them they will rise faster.

Once they have doubled in size remove the plastic wrap, put them in the oven if you did not let the rise in there and turn the oven to 350 degrees F.  Cook for approx. 45 mins or until the bread sounds hollow when you tap on the top of the loaf.  Take out of the oven, remove from the baking dishes and allow to cool on a bakers rack or on their sides on a bread board.  Allow to cool for a bit before you cut off a slice.  If you are too anxious, your loaf will be too soft and will not cut properly.  Be patient!

To make the rosemary, garlic cheddar bread  I added in 1 tbls. of dried rosemary crushed slightly in my hands to release the flavor.  1 Tbls of garlic powder (ok, maybe I put in a little more but I love garlic), and about 3/4 cups of shredded cheddar cheese.  This all gets added in to the dry ingredients before the wet stuff  is added.

I use this recipe to do a whole wheat bread.  Just substitute all or part of the white flour with wheat flour.  I have done it both ways and it is really good.

You can also add in 1/2 cup steel cut oats (just cut back a half cup on the flour) and try to use a little honey instead of the sugar.  A very good bread for peanut butter toast in the morning!

I am going to drop in some sunflower seeds one of these times.

If you want, you can use two eggs instead of one to boost the level of protein.  Just remember to cut back on the water or milk as you will want the egg/water/milk mix to equal 2 cups.  I really like the milk and eggs in my recipe so I cut back on the water.  I know that water has no calories but I want my bread to be fortified if I am going to use up my Carb. serving allotment on bread.

To make your bread fancier try cooking in it different types of oven safe dishes.  I have little individual serving baking dishes, or even corningware dishes that I use.  I also will shape my dough into a nice ball, put down a little corn meal on my cookie sheet and bake up a freestyle loaf.

I have used this recipe for pizza dough.  I only let it rise once and then spread it onto my pizza baking dish pushing it into shape with my finger tips.  I use a fork to poke little holes into it and pare-bake it for about 10 minutes before putting all my favorite pizza toppings on it.

Make them into big soft bread sticks or little crispy ones.  Just do the shaping before the second rising.

Make your own dinner rolls!

The plain white bread makes excellent cinnamon rolls.  Just bake them with cinnamon and butter topping and add some simple powder sugar & water frosting glaze.

Leave me comments and let me know what you do with it!  Enjoy....you know what is in it, who has touched it and that it is good for you!

I am thankful to God for giving me the Wisdom To Breath the wonderful aromas of this great bread while it is baking in my oven!    Amen!


Tuesday, July 24, 2012

Past 27 Days In A Nut Shell

Actually it would be really hard to put all that has happened in the past 27 day into a nut shell!  However, we have been busy.  Nick turned 26 on the 11th, Rachael turned 21 on the 15th, Becky and Mike have been busy planning their wedding.  Nick and Michelle got engaged with the wedding to be the month after Becky and Mike and Rachael took off for Vegas exactly 7 days after her birthday (by the way, she is having the time of her life and has asked if we could all go back next year as a family).  My youngest brother and his wife brought 2 beautiful boys into the world two days after Rachael's birthday.  They were able to claim their own day even with all of the other July birthdays we have in our family.

I have been busy with work and family and then found out last week we had 5 new tenants living on our property.  Aunt Diane called me out into the backyard and this is what we saw:
Do you see the two on the ground?  One under the wagon and the other just in front of it?  There is a gray one sitting on top of the burner next to the wagon.
 See the fourth little gray one on top of the shed?  This one is Christian and I will tell you why in a bit.


Well, there were four little kittens running around our back yard under and over the shed.  Up and down the trees and fencing chasing each other.  They were having the time of their life.  I guessed that they were about 2-3 months old.  2 orange tabbies and 2 gray tabbies.  My wonderful husband brought out his live traps and over the next 4 days we were able to catch 3 of the kittens and the little mother (she was only about 7 or  months old herself).  After a little leg work and research on my Aunt"s and Mother's part, we found that our local Humane Society has a program called TNR, or Trap, neuter and release for no charge.  It is solely funded on donations.  So, that is what we did.  I picked up the 3 kittens and their mother yesterday and the little ones are feisty.  Mama is resting in her own carrier but inside the Kittie kennel that my Aunt has out on her back patio.  We will be releasing them back into their environment tomorrow.  Perhaps they will hang around, perhaps they will run as fast as they can from us.  At least they will not be producing a bunch of Ferrell kitties themselves. 

So, why is the one on top of the shed named Christian when I did not name any of the others?  Well he/she is the sly one.  Has not been able to be caught yet.  I got a pretty good look at him/her up close and the coat is many shades of gray.  Hence the sly, many shades of gray Christian.  If you do not get it, then go to Nook or Amazon and buy and download the 3 book series 50 Shades of Grey.

Moving on......I have been very slow on getting the Cranberry Wine started for Becky's Wedding.  Sunday, we went to the local grocer and discovered that the cranberry concentrate that I use was on sale 10 for $10.  bought 25 cans and guess what...


Yes, I know, it is cutting it close.  I have been able to make the Cranberry in 2 months or less so, keep your fingers crossed and say a prayer.  As I was making this yesterday I kept running through my head how Jesus turned water into wine his cousins wedding party when they ran out and I believe in my heart that God will not fail me with this.  Cranberry always is fast and tastes the best without having to age it.  It is fermenting away today!  Yahoo!!!
We had a little bit of rain last night.  The drought has been brutal but my garden has produced one zucchini and about 5 cucumbers.  Larry make sures that it stays watered.  Brian and Nick ate my first cucumber up without sharing a bite.  They felt bad (I bet) so they told me that it was not really that good.  I shared the second and third with them.  I have many hot peppers that need to be picked and we have had a few green beans which Brian and the big kids like to eat raw. 
The little bit of rain we had last night got the ground wet and made a lot of noise but I do not think that it did much for the plants and grass.  A friend called me last week and told me she was going to do a rain dance that night.  Guess what I saw on my way into work the next day...
 Yes, that is rain on my car windows.  I sent her a text and told her it work!  However, it only gave our dry ground a sweet kiss of moisture and was gone and just a memory like the real sweet kiss from the one you love.  Perhaps it was a kiss from God.

So, this is my parting comments......

1. I wish that I lived out in the country and the only work I had to do was the work to sustain a way of self reliant living.  But, I am thankful that regardless of where I live we are able to make a living and provide for ourselves what we need.

2.  I wish that the physical pain I live with would just disappear.  But, I am thankful that I am able to get out of bed and walk on my own everyday.

3.  I wish all of the hurtful things that the people of this world say and do to each other every day would turn into loving acts of kindness.  However, I am thankful that those that are near to me and really truly love me are in my life on pretty much a daily basis.  They say blood is thicker then water.  When it comes to science, yes it is.  When it come to real-life and love, it is not.  It is the people that do and give to you to make you feel loved and worthwhile and do not expect anything in return that really are your family. 

4.  God asks us to pray for only one group of people in our lives, it is our enemies......I pray for those people but, I pray for all the others in my life also that are good and kind.

5.  With everything happening behind the scenes in my life that I do not put out there for the public, I pray that I continue to find the WISDOM TO BREATH and pray that you all do too.


Wednesday, June 27, 2012

What Type of Rider Are You?

I was trying to fall asleep last night and realized that life is like a rollor coaster ride.   I am sure that many have heard that simalie before.  This is how I inturrperet it:

We buy our ticket and get in line (this is our birth and the formative years).  As we stand in line we people watch and critisize all the other people in line maybe even learning from some during the wait.  For some of us the line is really short and we leave it before the ride even really begins (very sad). 

As we get closer to the actual ride itself, we become  hesitant, fearful, impatient (I have seem some line jumpers trying to get to the ride ahead of others not wanting to wait their turn).  We see the others ahead of us on the ride.  Some are laughing and shouting with joy, others are screaming in fear while others yet are quiet.

Our turn comes and we climb on, get locked in....now there is no turning back (we are adults, legal age our childhood is gone).  The roller coaster takes us on ups and downs, twists and turns.  Some take us into dark tunnels.  We can not always see what is just around the corner, over the next hill or what or how many twists we have ahead of us. 

Are you the one hooting and hollering with your arms in the air enjoying the adventure?  Never wanting the ride to end?

Could it be that you are the one so fearful that you are screaming, scared and clenching the grab bars with the queezy stomach wondering how you are going to make it through the ride?  Knowing you will, but not able to let go and just take each up and down, twist and turn as it comes.

Perhaps you are the fearful one with your eyes shut.  Trying to imagine yourself some where else, doing something else.  Unable to accept that you are truley in the here and now.  Pretending that this ride is not happening.

As I reflected on this and continue to do so, I believe that I mix up my rides.  Kind of like a bipolar individual (perhaps I am!).  It is not always the best being a nurse and knowing just enough but not enough!  LOL or NOT!  Each one of my days I am a different rider.  On the outside I am the hooter, the hollerer, that is what everyone sees and believes.  However, inside I am screaming and scared...wishing that my ride whould just end.  Not sure how I will make it through the next twist or turn.  Often wondering why it has to keep twisting and turning, soaring and then dropping off.  Inside, I would like to just shut my eyes and pretend that this is someone elses ride.  That I have my farm out in the country, far away from the real world where I can raise my animals, grow my food and be alone with nature and escape the real world.  Taking care of just myself and those that choose to live the same way.

I understand that God tests our faith. He is not really "testing" our faith but making it stronger.  Each day that we get by and still BELIEVE we are stronger!

One thing is for sure, the ride will end for all of us.  Will we get off the ride and look back and wish we could do it all again or will we have regrets?  Would we have choosen a different ride.  The little kiddie ride or the super-duper Mega  coaster if we had been given a choice?

What type of ride are you on and what type of rider are you?

Every day wake-up and say "I have the WISDOM TO BREATH"!

Sunday, June 17, 2012

One of my Reasons will be having their own Reason!

So they say "when life gives you lemons, make lemonade!"  Well, our lemonade will be sweet!  Hard to imagine but, in less then a year a little one will be joining our family.  What a blessing babies are!   A Reason to share a love like he has never known!  A Reason to get up every day and say "I am going to do my best to use the talents that God has given me."  "I am going to love unconditionally the way my parents have and continue to love me."  "I have a Reason to set the best example I can!"

While we expected that the first little one would be coming from our daughter who is marrying the love of her life on September 15th of this year, God stepped in and showed us differently!  So, a little detour in all of our lives has occurred, but hey, detours still get you to where you need and want to go, just a little different way getting there.  But, we all still get there. 

So, to my Son who was my first Reason.......I love you!  I love you inside and out.  God is holding your hand and will show you the way to get there.  Your father has been the best dad that I could ever ask for and the best man in my life.  Look at him, learn from him, use the memories that the two of you have created and then start working on the ones that you will create for and with your Reason for everything in your life from this day forward!

Happy Father's Day!